¶ This guide is community provided and only supported by other community users.
UNDER CONSTRUCTION - Community contributions are needed please reach out!
¶ Introduction
If you are an existing Raspberry Pi ("RPi") RoninDojo bitcoin node user looking to update to v2.0.0, then this guide is for you!
To date RoninOS has be built on top of Manjaro ARM. Going forward this is changing, and from RoninDojo v2.0.0 the base operating system will instead be RPi OS/Debian for RPi users. This will bring with it stability improvements.
¶ What is required by you?
- Download the official RPi Imager application
- Use RPi Imager application to reflash the microSD
- Run some command line instructions to prepare Raspberry Pi OS for RoninOS/RoninDojo 2.0.0
- Install RoninOS/RoninDojo 2.0.0
- Create a new RoninUI password (which will also be used to SSH via the terminal)
- Re-connect your Samourai Wallet
- Re-initialize Whirlpool CLI to continue remixing
¶ Instructions For Upgrading to RoninOS v2.0.0 on Raspberry Pi
¶ Step 1: Power down your RoninDojo
- Login to your RoninUI, then go:
Dashboard>RoninDojo>Manage>Shut down device - Wait for 5 minutes, then disconnect the power supply from your node.
- Ensure your primary SSD hard drive is connected to your Raspberry Pi.
- If you have an additional external backup hard drive plugged in, disconnect it now. Leave it disconnected until Step 13.
¶ Step 2: Remove the microSD from your node
- Raspberry Pi: Pull out the microSD from your Raspberry Pi and put the microSD into a suitable adapter which can be accessed on your computer/laptop.
¶ Step 3: Download the official Raspberry Pi Imager software
Raspberry Pi Imager is the quick and easy way to install Raspberry Pi OS and other operating systems to a microSD card, ready to use with your Raspberry Pi
- Windows users: Raspberry Pi Imager for Windows
- MacOS users:Raspberry Pi Imager for MacOS
- Ubuntu/PopOS/Debian users:Raspberry Pi Imager for Ubuntu
¶ Step 4: Install the official Raspberry Pi Imager software
- Windows users: Double click the imager_1.7.x.exe in your Downloads folder and follow the instructions on screen. Launch the application when installation has completed.
- MacOS users: Double click the imager_1.7.x.dmg in your Downloads folder and follow the instuctions on screen. Launch the application when installation has completed.
- Ubuntu/PopOS/Debian users: Open Terminal and then do the following:
-
cd Downloadsand Press ENTER -
sudo apt install ./imagerthen Press TAB key and then Press ENTER -
type
yand Press ENTER to install all dependencies -
Click show applications icon
-
select Imager with the app icon of a Raspberry to launch the application.
¶ Step 5: Configure Raspberry Pi Imager Software
With the Raspberry Pi Imager Application launched you should be looking at a screen that looks like this:
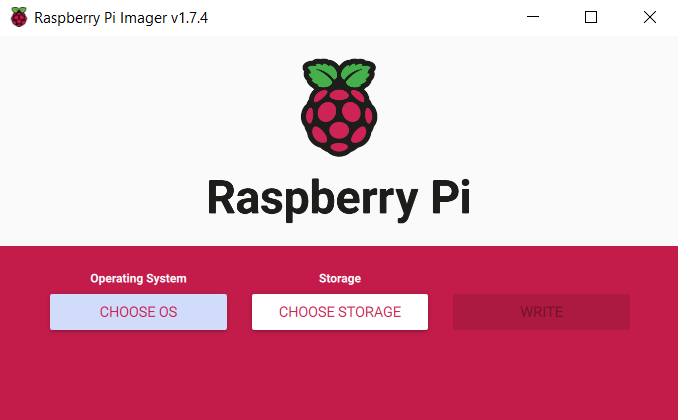
- Click CHOOSE OS and you will see options appear. You want to select by clicking on Raspberry Pi OS (other)

- Scroll down and select by clicking on Raspberry Pi OS (Legacy, 64-bit) Lite

Before Proceeding: You should ensure your microSD that you removed from Step 2 is now in a suitable adapter and it is connected to your computer/laptop.
- Click CHOOSE STORAGE then you want to select by clicking on Generic MassStorageClass 31.9 GB it should look something like this:

The below is an essential step and must be carried out prior to writing the microSD card. Please take care with this next step otherwise you may experience issues and will be required to re-flash the microSD.
-
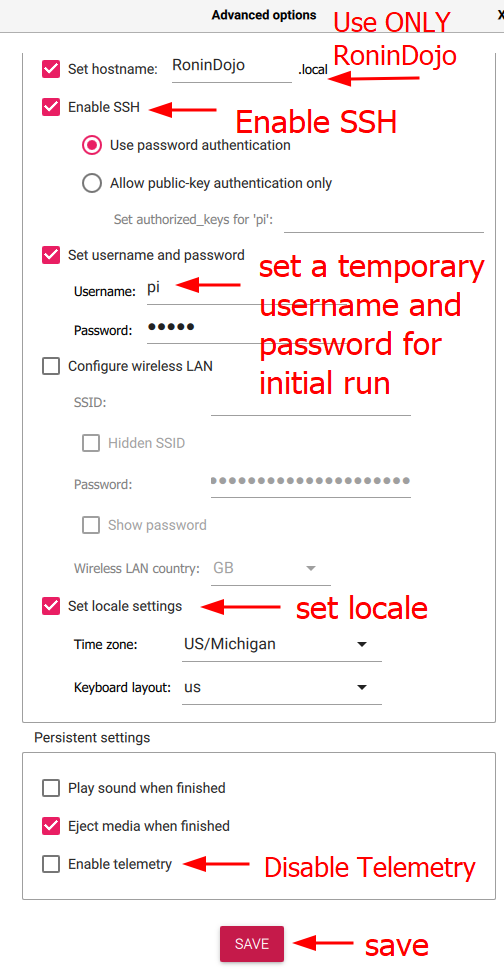
Click on the Cog icon to load the Advanced Settings Options
- Set hostname to
RoninDojo - Check the box to enable SSH
- Set a temporary username
pi(This user will be removed later) - Set any temporary password for the user Pi and make a note of it.
- Set locale settings (timezone and keyboard layout)
- Disable Telemetry by removing the check
- Set hostname to
Once you have completed the above steps check that your options look like this:
-
If your settings match the screenshot above Click SAVE
-
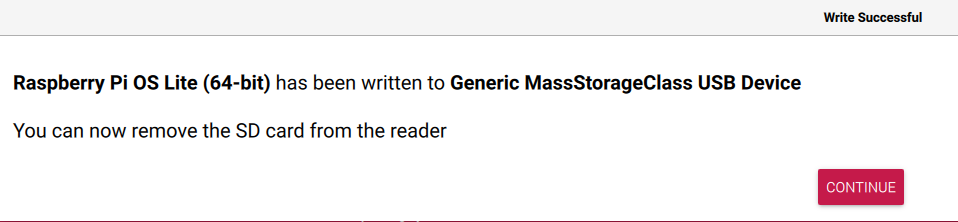
Click WRITE to write the microSD
A pop up will appear asking you to confirm you wish to delete all existing data on the selected storage device. Use this opportunity to double check that you are erasing the correct device i.e. The Generic MassStorage 32GB microSD card.
- If you are satisfied you are erasing the microSD click YES

- When you see the Write Succesful pop-up appear you can remove the microSD from the computer/laptop and Click CONTINUE
¶ Step 6: Spin your node back up
- Insert your microSD card back into your node.
- First, reconnect your Ethernet cable.
- After you have reconnected the Ethernet cable, then connect the power supply.
- Press the power button (if applicable).
¶ Step 7: SSH into your node
Notice: if you are struggling to find the IP address, ensure your node is turned on! You can also try using Angry IP Scanner or check your router control panel.
- Open a new clean Terminal/Powershell
ssh-keygen -R [IP]For examplessh-keygen -R 192.168.1.140ssh pi@[IP]For examplessh pi@192.168.1.140- type
yesand Press ENTER when asked Are you sure you want to continue connecting? - type the password you set in Step 5 and Press ENTER
¶ Step 8: Update RPi OS and Preparation for RoninOS
sudo apt update && sudo apt upgrade -ysudo apt install git dialog tor npm -ysudo echo "denyinterfaces veth*" >> /etc/dhcpcd.confsudo git clone --branch master https://code.samourai.io/ronindojo/RoninOS.git /opt/RoninOScd /opt/RoninOS/ && sudo ./customize-image.sh
Be sure to wait the full 10 minutes for the preparation setup to complete in terminal before continuing to Step 9 otherwise you may experience issues and will be required to re-flash the microSD.
¶ Step 9: Start RoninOS Setup
We are almost there now. We will do a couple more command line instructions to install RoninOS
sudo systemctl start ronin-setuptail -f /home/ronindojo/.logs/setup.logs
All good things come to those who wait, we are almost there be sure to grab a cup of coffee and wait a further 15 minutes before proceeding to the next step.
¶ Step 10: Access the RoninUI
- After 15 minutes is up, open your web browser and navigate to the IP address of the node in the URL bar. For example 192.168.1.140
alternatively
- Navigate to ronindojo.local
¶ Step 11: Complete RoninUI setup
Follow the on-screen instructions:
- Note down the root password.
- Create a user password (used for logging into the RoninUI, and for SSHing).
- Then wait for your node to complete initialization.
- Proceed to the dashboard
Make sure you leave the terminal window open from Step 9 until Boltzmann Calculator install completes and wait until you see the following message
***
All RoninDojo feature installations complete!
***

active
Removed /etc/systemd/system/multi-user.target.wants/ronin-setup.service
- Then you can Ctrl+C out of the log or simply close the terminal.
¶ Step 12: Remove the temporary pi user
-
Open a new clean Terminal/Powershell
-
ssh ronindojo@[IP]For examplessh ronindojo@192.168.1.140 -
enter the password for RoninDojo that you set in Step 11
-
You may be asked to re-enter the password a second time, go ahead and do so
-
At the RoninCLI menu choose Exit RoninDojo
-
type
sudo deluser --remove-home piand Press ENTER -
type
sudo reboot nowENTER -
You did it! Enjoy RoninDojo 2.0.0
¶ Step 13: Fix RoninUI (Missing .onion url)
You do not need to do Step 13 if you already have a .onion tor UI url showing in your RoninDojo -> Manage Container. Only perform Step 13 if the RoninUI Tor .onion url is missing from the RoninDojo -> Manage Container.
-
ssh ronindojo@[IP]For examplessh ronindojo@192.168.1.140 -
enter the password for RoninDojo that you set in Step 11
-
sudo su -
systemctl stop tor.service -
rm -rf /mnt/usb/tor -
mkdir /mnt/usb/tor -
mkdir /mnt/usb/tor/hidden_service_ronin_backend -
chown -R tor:tor /mnt/usb/tor -
chmod -R 700 /mnt/usb/tor -
systemctl start tor.service -
cat /mnt/usb/tor/hidden_service_ronin_backend/hostname > /home/ronindojo/.config/RoninDojo/data/ronin-ui-tor-hostname -
sudo reboot now
¶ Step 14: Wait for your node to catch back up
The blockcahin data and indexer data will be salvaged. You just need to wait for them both to catch up to the latest blockheight.
Before continuing to the next step, wait for the following to be displayed within your RoninUI:
- Dojo 100% Synchronized
- Bitcoin Core 100% Synchronized
- Indexer 100% Synchronized
Notice: If Dojo does not reach 100% Synchronized, restart Dojo from within your RoninUI by going: Dashboard > Dojo > Manage > Restart, then wait for Dojo to reach 100% before continuing to Step 15.
¶ Step 15: Reconnect your Samourai Wallet
Use the following guide to reconnect your existing Samourai Wallet to your RoninDojo node:
¶ Step 16: Pair your Samourai Wallet to Whirlpool CLI running on your RoninDojo
First open your Whirlpool GUI desktop application:
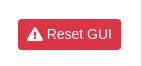
- Go to the
Systemsettings, and click onReset GUI
Then follow the instructions here to connect your Samourai Wallet to your Whirlpool GUI / Whirlpool CLI:
¶ Step 17: Updated .onion URLs
Finally, now you have upgraded to RoninDojo v2.0.0, the following .onion URLs will have changed:
-
RoninUI
Dashboard>RoninDojo>Manage -
Mempool (if installed)
Dashboard>Mempool Space
Don't forget to update any bookmarks you have!
¶ FAQs
- Why is a reflash required?
- It is only possible to move to a Debian based operating system by reflashing.
- Is the v2.0.0 image plug 'n' play?
- For RockPro64 users, yes. After placing the flashed microSD back in your node and applying power, automatic installation and initialization will be carried out. This is new and a lot quicker to get back up and running.
- For Raspberry Pi users, no.
A Raspberry Pi image is currently unavailable for v2.0.0.
- Will my node have to download the entire blockchain again after upgrading?
- No your IBD will be salvaged. Then any missing blocks from your node's downtime will be downloaded once it is operational again.
- Will I have to wait for indexing of the bockchain to be carried out after upgrading?
- No. Your current indexer data will be salvaged. Then any missing blocks from your node's downtime will be indexed once it is operational again.
- I am currently running Electrs / Fulcrum as my indexer. Will the .onion URL change?
- No. After upgrading it will remain the same. If you had Sparrow connected to your node previously, you will not need to change the server details within the Sparrow server settings.
- Will the RoninUI .onion URL change?
- Yes. Don't forget to bookmark your new RoninUI .onion URL for remote access over Tor.
- I currently have Bisq / Mempool installed. Will they still be installed after upgrading?
- Yes. Although the Mempool .onion URL will change, so don't forget to bookmark it.
- Will I need to re-connect my Samourai Wallet after upgrading?
- Yes. We have a shortcut method for that however, so manual rescans should not be required. (Instructions below).
- I am currently using Whirlpool on my node. Will I lose access to these coins, or have to do anything after upgrading?
- Your bitcoin in Whirlpool is controlled by your private keys on Samourai Wallet. You will not loose access to any bitcoin. After reconnecting your Samourai Wallet to your upgraded node, you will need to reconfigure the Whirlpool CLI on your node to pick up from where you left off and continue mixing/remixing. (Instructions below).