¶ Basic System Troubleshooting
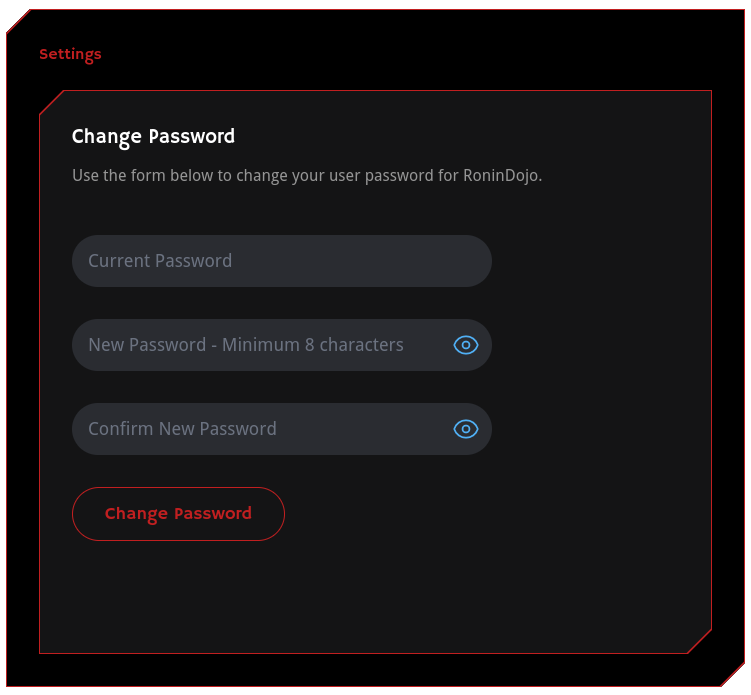
¶ Change Password
To change your password navigate to the Settings tab on your RoninUI dashboard and fill out the form.
¶ Incorrect Password
Caused by either too many wrong attempts or using special characters.
◦ Avoid using passwords with special characters
◦ Too many incorrect attempts may lead to temporary lockout
¶ Advanced System Troubleshooting
TIP: The following troubleshooting sections may be considered advanced to newer users.
¶ Firewall
The Firewall Menu can be accessed anytime from the main RoninCLI menus.
System → Next Page → Networking → Firewall
Please take note, during the system setup of RoninDojo your device's local IP address range is given access to Port 22 which is for SSH remote login. That means any device on your local network has SSH access to your RoninDojo. Leaving this setting default is NOT RECOMMENDED for users who are connecting to something like University, Public Internet, etc.
If you would like to add add a specific IP address instead of an IP address range, delete rules, etc. please visit the network migration section below.
¶ Language
If you need to change language edit locale.conf file, here is the command for English:
localectl set-locale LANG=en_US.UTF-8
If you need to change language edit locale.conf file, here is the command for Spanish:
localectl set-locale LANG=es_ES.UTF-8
To apply changes, run command:
unset LANG
Source the changes:
source /etc/locale.gen
See the Debian Linux Wiki for more information about locales.
¶ SSH Lockout
Go to the Firewall Menu in the RoninCLI. Once there, check the status of the firewall to make sure the rule matches your IP address range or specific IP address.
System → Next Page → Networking → Firewall → Status
If you are locked out and cannot log in via SSH, then you may need to plug in an HDMI screen and USB keyboard into the device.
If you need to move to a new network or change IP address please see below.
¶ SSH Remote Login
SSH into your RoninDojo device from any computer on your network. Simply open terminal, type in ssh with a space after, type in the username, an @ symbol, and follow with the local IP of your RoninDojo device.
An example is:
ssh ronindojo@192.168.1.12
If needed, look up your RoninDojo device IP address by logging into your router admin panel.
If you cannot SSH remote login to your RoninDojo device, then the best course of action may be to plug in an HDMI screen and USB keyboard.
¶ Remote Host Identification Has Changed
The "Remote Host Identification Has Changed" message can be resolved by typing the following command:
ssh-keygen -R [yourLocalTantoIP]
Make sure to remove the brackets and only enter your actual device local IP address, for example:
ssh-keygen -R 192.168.100.3
The most common reasons for this message are:
1. Reinstallation of Ronin OS: If the operating system is reinstalled, it generates a new SSH key. As a result, when you try to SSH into the Tanto, the SSH client detects a different host identification information.
2. IP address change: If the IP address of the Tanto is changed, the SSH client may show the "REMOTE HOST IDENTIFICATION HAS CHANGED" message. Your router may occasionally issue a new IP address to devices on the network, depending on its DHCP lease time.
¶ Setup SSH Key Authentication Login
To enable SSH key authentication in Linux all you need to do is to generate a public authentication key and append it to the remote hosts ~/.ssh/authorized_keys file.
The following steps will describe the process for configuring key authentication login:
- Check for existing SSH key pair.
Before generating a new SSH key pair first check if you already have an SSH key on your client machine because you don’t want to overwrite your existing keys.
Run the following ls command to see if existing SSH keys are present:
ls -al ~/.ssh/*.pub
If there are existing keys, you can either use those and skip the next step or generate a new one.
If you see 'No such file or directory' or 'no matches found' it means that you do not have an SSH key and you can proceed with the next step and generate a new one.
- Generate a new SSH key pair.
The following command will generate a new 4096 bits SSH key pair with your email address as a comment:
ssh-keygen -t ed25519 -b 4096 -C "your_email@domain.com"
Press Enter to accept the default file location and file name or appent the -f flag to set a custom name, for example:
ssh-keygen -t ed25519 -b 4096 -C "your_email@domain.com" -f ~/.ssh/my_ed25519_key
Enter file in which to save the key (/home/yourusername/.ssh/id_ed25519):
Next, the ssh-keygen tool will ask you to type a secure passphrase. Whether you want to use passphrase it’s up to you but we highly recommend you set a strong password phrase. If you don’t want to use a passphrase just press Enter.
Enter passphrase (empty for no passphrase):
To be sure that the SSH keys are generated you can list your new private and public keys with:
ls ~/.ssh/id_*
/home/yourusername/.ssh/id_ed25519 /home/yourusername/.ssh/id_ed25519.pub
- Copy the public key
Now that you have generated an SSH key pair, in order to be able to login to your server you need to copy the public key to the server you want to manage.
The easiest way to copy your public key to your server is to use a command called ssh-copy-id. On your local machine terminal type:
ssh-copy-id remote_username@server_ip_address
You will be prompted to enter the remote_username password:
remote_username@server_ip_address's password:
Once the user is authenticated, the public key will be appended to the remote user authorized_keys file and connection will be closed.
If by some reason the ssh-copy-id utility is not available on your local computer you can use the following command to copy the public key:
> cat ~/.ssh/id_rsa.pub | ssh remote_username@server_ip_address "mkdir ~/.ssh && chmod 700 ~/.ssh && cat >> ~/.ssh/authorized_keys && chmod 600 ~/.ssh/authorized_keys"
- Login to your server using SSH keys
After completing the steps above you should be able log in to the remote server.
To test it just try to login to your server via SSH:
ssh -i ~/.ssh/id_ed25519.pub remote_username@server_ip_address
If everything went well, you will be logged in after entering your password phrase.
¶ Moving RoninDojo to New Network
Are you on the move? Time to change locations or networks? Use the RoninDojo Firewall menu to add a new SSH IP Range, delete a specific rule, check Firewall status, and more.
System → Next Page → Networking → Firewall → Add IP Range for SSH
or
System → Next Page → Networking → Firewall → Add Specific IP for SSH
¶ Task Manager
Go to the RoninCLI menu and select Task Manager to see current proceses and resource usage.
System → System Monitoring → Task Manager
¶ Additional Info
Check out Extras for more inspiration and ideas.
Join the RoninDojo Chatroom and engage the community.